
Real Estate Photography Made Easy: Expert Tips for Success

Are you trying to get better at photographing real estate? If so, you've arrived at the right place.
You don't need to buy expensive photography gear to use these suggestions. So, even if you're not a photographer, you can still benefit from this article.
If you want to advertise your property for sale or rent, you can use them.
If you are a realtor photographing a client's property, they are also helpful.
They are handy for amateur photographers hoping to advance their abilities.
If any of these circumstances apply to you, continue reading:
What Is Real Estate Photography?
Real estate photography is a subset of commercial photography focusing on real estate, which can include vacant land and residential, commercial, industrial, and even industrial properties. Furthermore, there are subcategories within each of these categories. Residential properties include, for instance, single-family homes, condominiums, apartments, co-ops, etc.
Since it is commercial photography, the goal is typically to highlight the features of the property to draw in potential buyers, tenants, or subtenants.
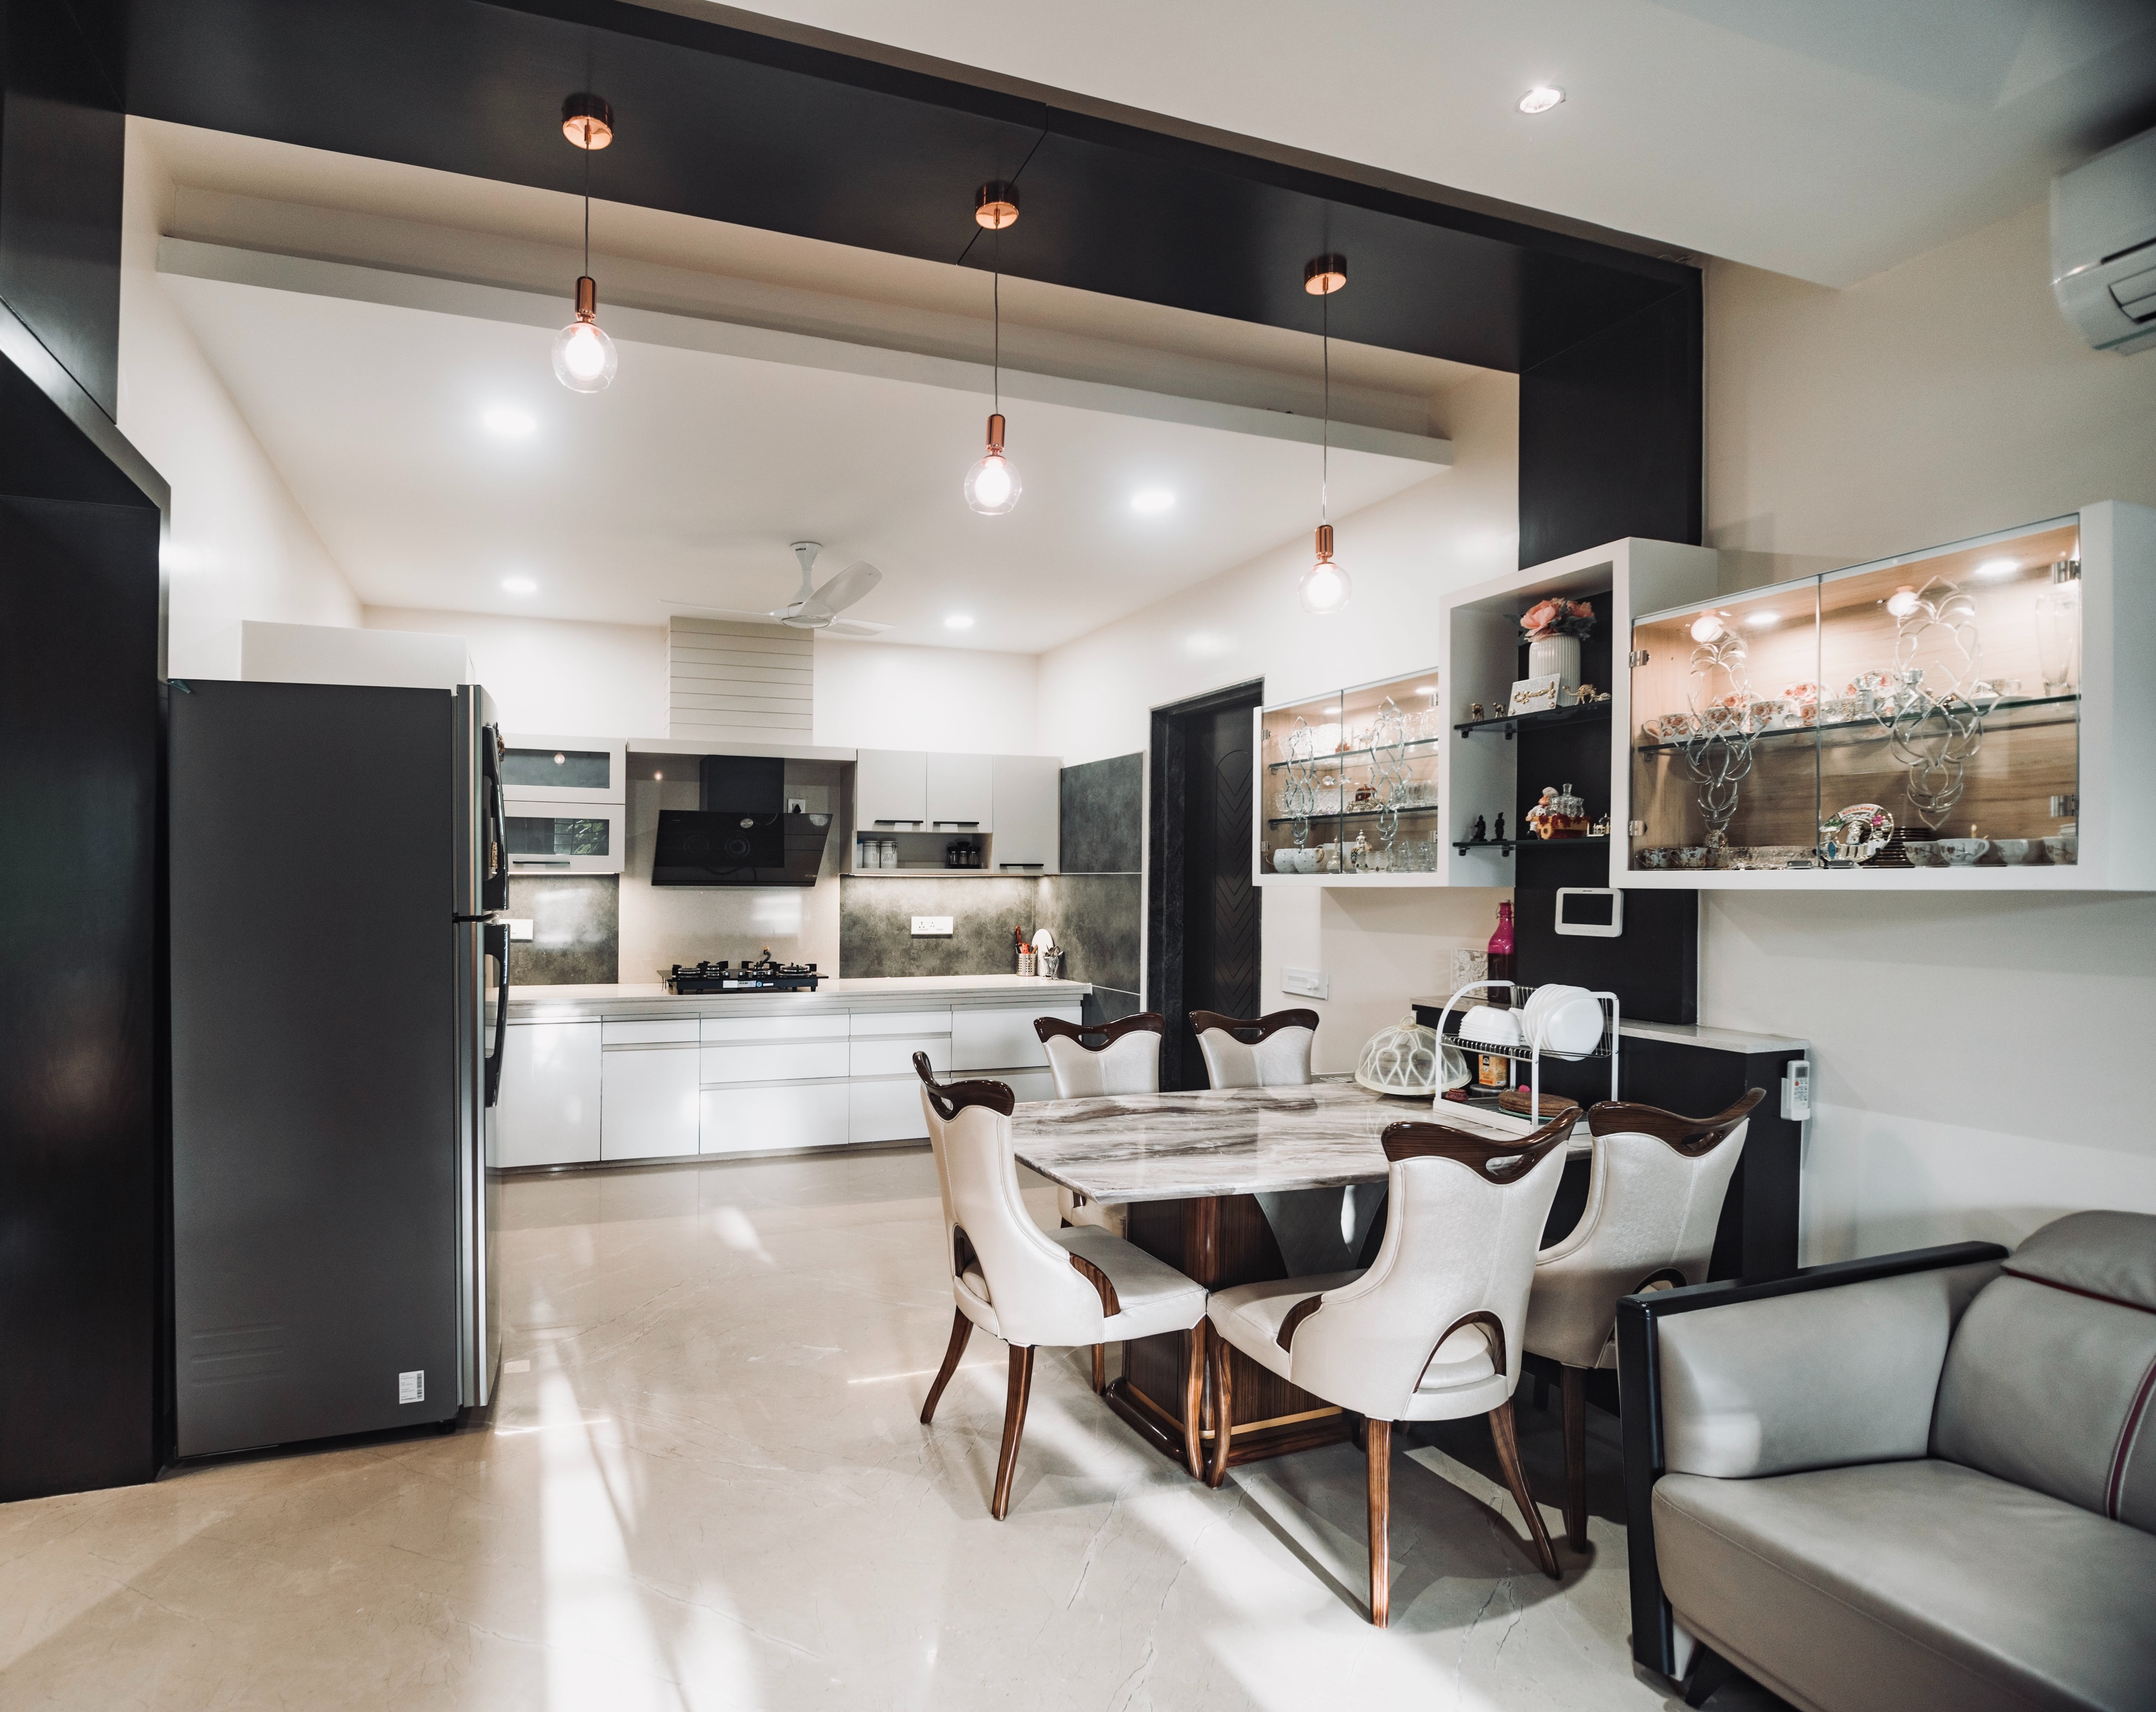
Real estate photography ALWAYS involves a SERIES of images rather than just one. In most cases, you'll need to take pictures of the exterior and interior of the building. Each property will determine the exact number of images and what they display.

Real Estate vs. Exterior Architecture And Interior Photography
The primary distinction between real estate photography and interior and architectural photography is the intended use of the final images. Although it may seem insignificant, the entire procedure is impacted.
As we've already mentioned, the main goal of real estate photography is to present a home in a way that appeals to potential buyers. However, images of architecture and interiors are frequently used in editorial photography, as fine art, and in the portfolios of architects and designers.
The time spent shooting and editing the images and the level of detail makes them very different due to how the images are used in these various types of photography.
Additionally, in real estate photography, the photographer will typically attempt to take as the objective of a picture as they can (for moral reasons). On the other hand, a photographer who specializes in architecture might use more artistic lighting and perspective. The quality of your property photographs and 360 panoramas matters in professional real estate photography. And yet, many real estate agents fail to invest wisely in professional real estate photography, including real estate listings. Or worse – perhaps they don't invest at all. As a result, the fee for architectural photography will be much higher than for professional photographers specializing in real estate. Using high-quality photos in real estate listings is one of the most powerful ways to attract more leads and drive sales. Real estate photography requires thoughtful composition, staging and preparation, camera settings, proper equipment, and ample lighting.

Real Estate Photography Editing Tips
Here are some suggestions to assist you if you want to start in real estate photography or hone your abilities.
1 - Use a Shot List
Create a hit list. You know that real estate photography has a limited budget and requires a rapid turnaround. You can organize your photography packages and streamline your photo shoots with a shot list.
For each type of property, you can make a unique shot list. Some things to consider are the number of rooms on the property and whether it is a house or an apartment.
An illustration shot list for a home is provided here:
- outdoor picture
- Backyard shot only if there is a garden, pool, or other feature to highlight
- Per bedroom, one shot
- a single image of the living room
- One shot per restroom
- a single picture of the kitchen
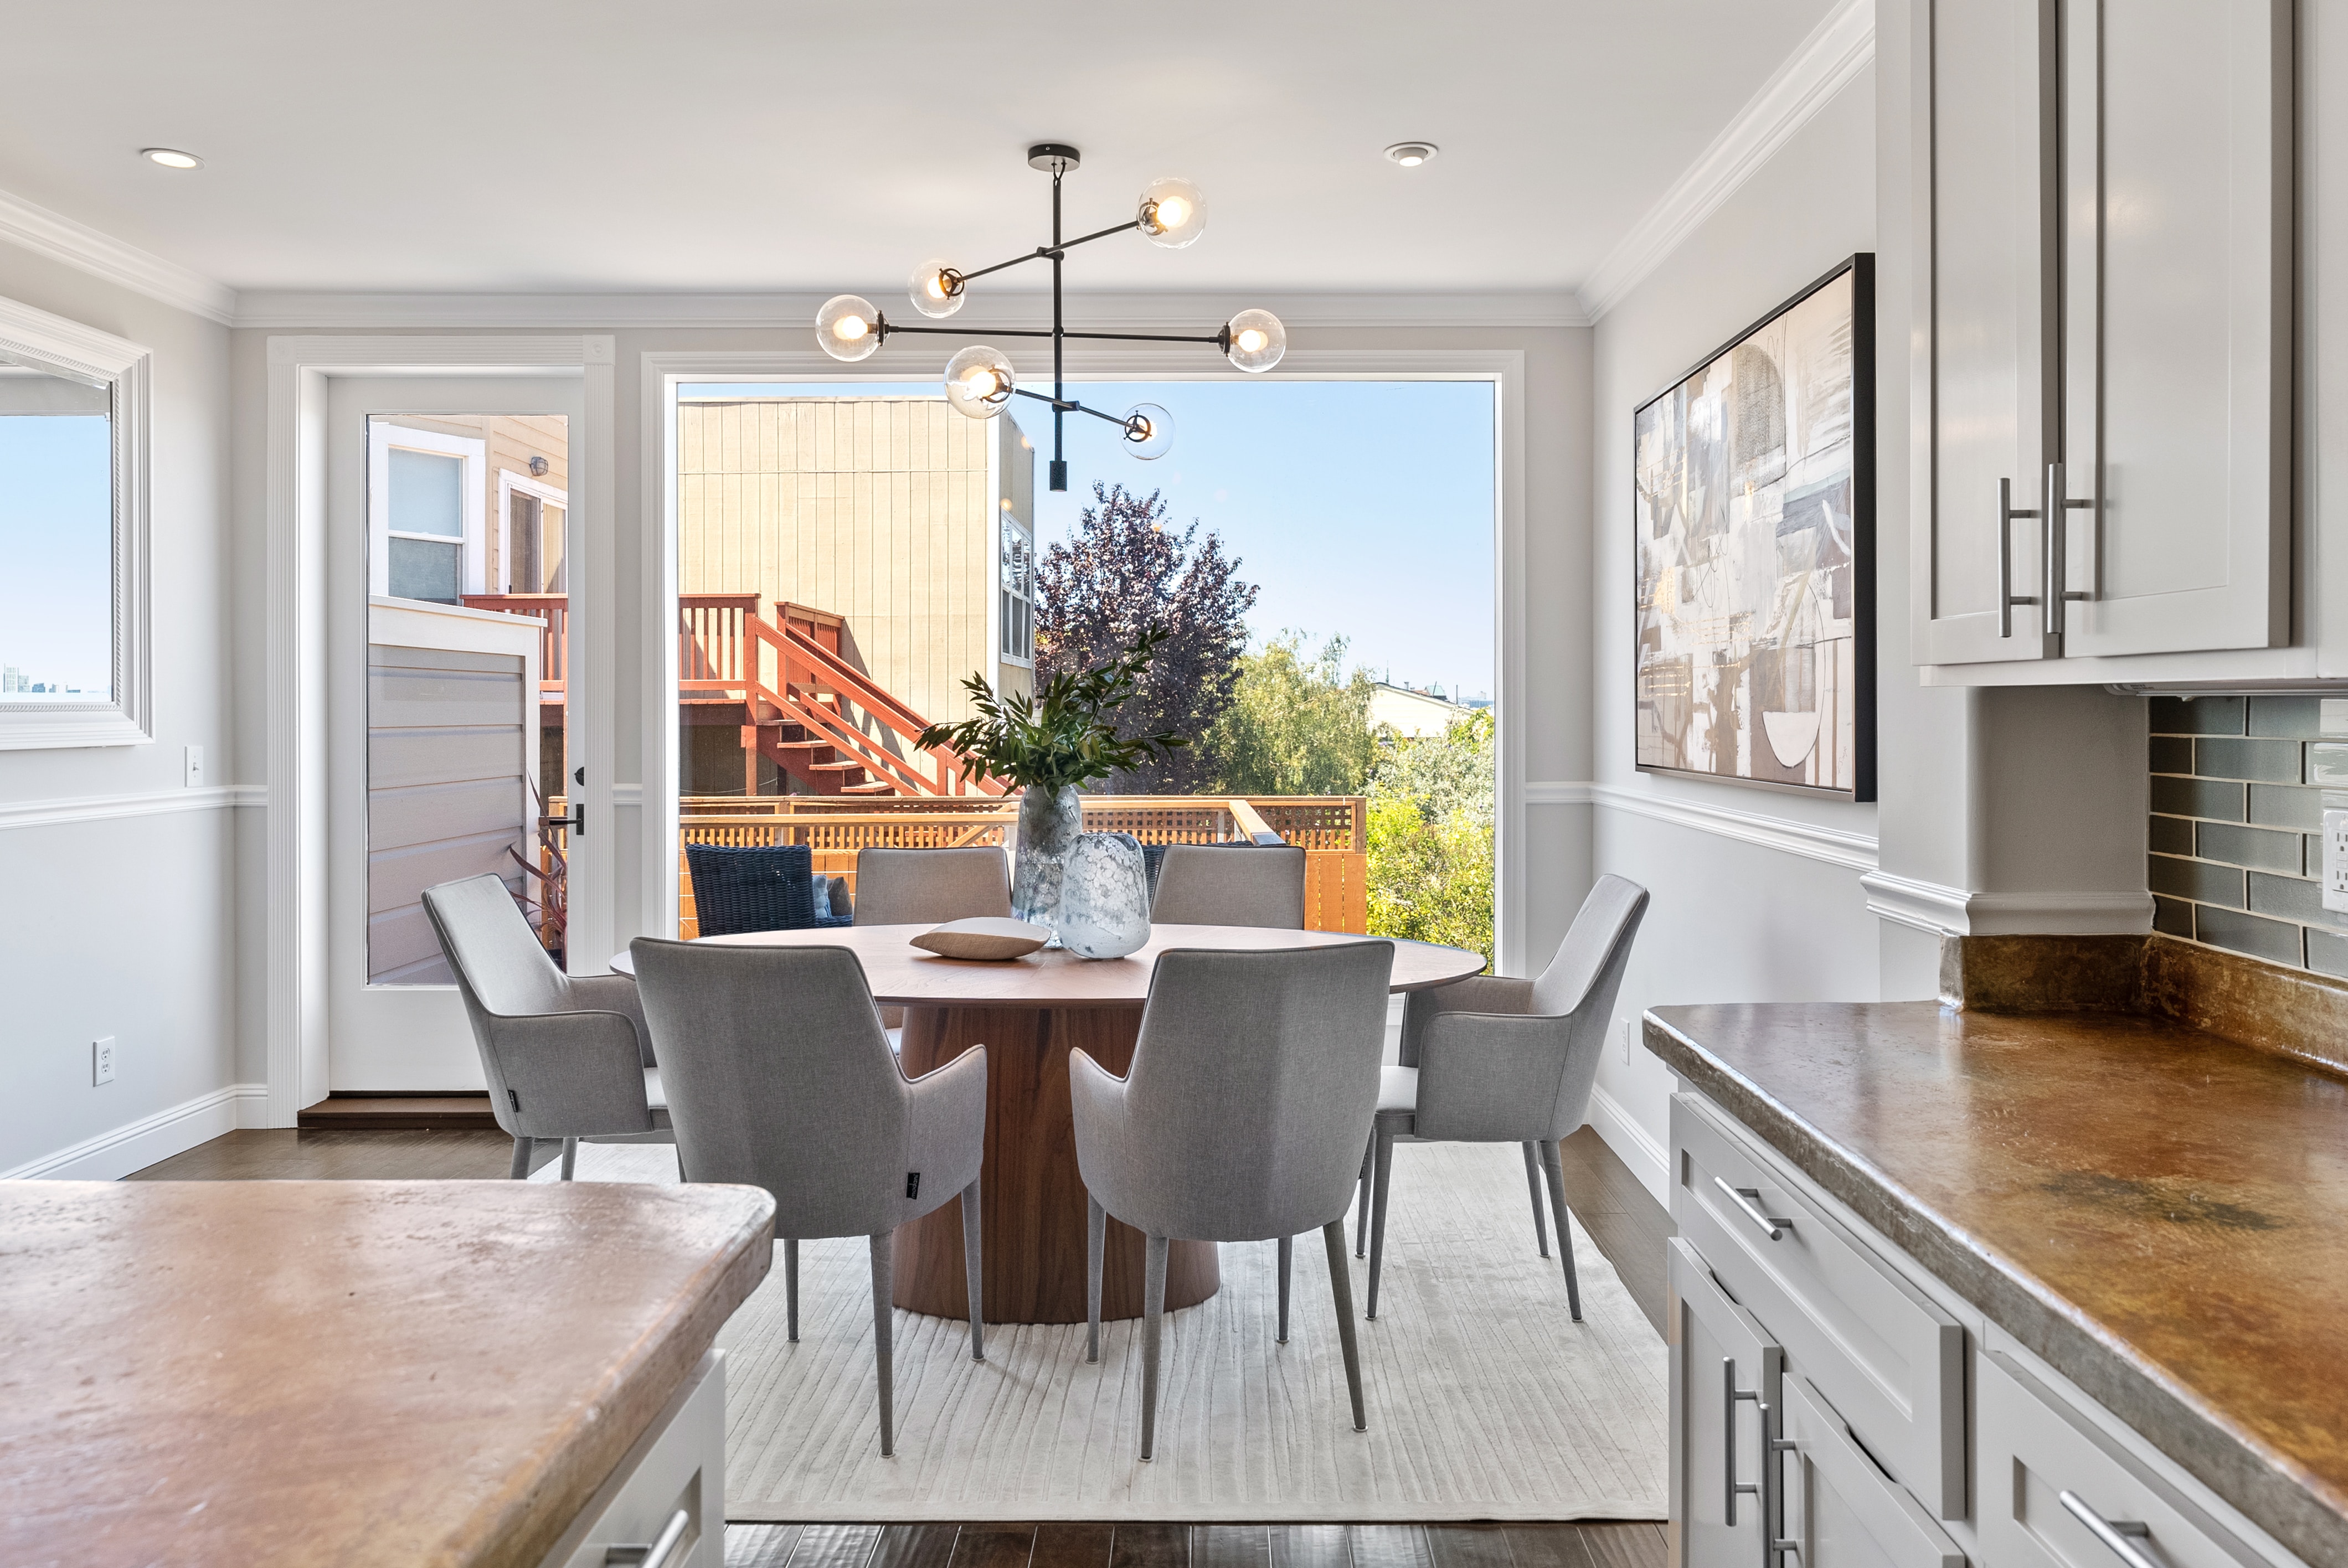
- a single view of the dining area
Of course, you can adjust this list for each location. Just be sure to change your fee if your client requests more pictures than what is included in your standard package.

2 - Ensure The Property Is Clean Before The Shoot (Remove Clutter)
No matter how good of a photographer you are, pictures of a messy or dirty house with imperfections won't look good. Make sure to make it clear to your client that the house will be tidy and prepared for photos and that cleaning and organizing a house is NOT part of your services. I recommend you send your clients a task list for prepping the home before the photo session.
Of course, if you choose, you can provide those services, but you should charge more to compensate for the time spent preparing for the photo shoot.
Regardless of your skill as a photographer, images of a messy or dirty house won't look good. Ensure your client understands that the house will be clean and ready for pictures and that organizing and cleaning a house is NOT part of your services.
Of course, you can offer those services if you want to, but you should charge more to cover the time spent preparing for the photo shoot.

3 - Find a Good Home Stager To Showcase Better
Home staging is a service that entails redecorating a home, moving furniture around, etc., to make the home appear as appealing to potential buyers as possible. If a property owner is going to do this, it usually happens before taking real estate photos.
Adding home staging to your list of offerings can help you draw in more affluent clients. Of course, this should have a price distinct from your photography services.
You might not always be able to pick the home stager you work with because many realtors already have someone they trust on hand. Working with someone you know, though, is preferable.
Hiring a stager for personal projects like developing your portfolio or selling real estate photos to stock photography websites can also be brilliant.
You can also gain advice from a seasoned stager to apply when working independently.
4 - Choose The Right Listing Time To Shoot
Since you must schedule photo shoots by the homeowner and the realtor, real estate photography frequently leaves little room for flexibility.
Shoot in the early morning or late afternoon if at all possible. Because they produce gentle shadows and warm tones for photographs that look great for almost any property, those times are frequently called the "golden hours." But make sure the sun is shining on the house's front.
A cloudy day with overcast skies also offers good weather conditions for taking pictures of houses, especially during sunset. Sadly, it will result in a drab sky framing the property. However, that can be quickly fixed in post-processing using a lovely sky overlay, among my favorites, such as one of Pretty Presets & Actions' painted sky overlays. Cloudy skies can eliminate problems with the sun's position and provide the best lighting for exterior real estate photos, especially during sunset. The right real estate photo editing software can help you develop a good editing eye. Choosing the right time is very important for real estate photographers. If it is possible, schedule a photo shoot in the daytime. This way, you will get a lot of natural light and bright, saturated colors in your pictures. If the weather is cloudy, you should choose another time for shooting.
You may want to consider adjusting your rate if you ARE asked to shoot at night or in poor lighting conditions because you will need to bring flashes, additional equipment, and possibly an assistant.

5 - Use a Tripod (Drone For Aerial)
For taking real estate photos, a tripod is a necessity. You can better compose your images and avoid or lessen perspective distortion if you have a fixed frame.
A tripod is also necessary when shooting in dim lighting. A quick shutter speed is frequently not possible due to the weak ambient light that is present. Additionally, your photos will turn out blurry if you don't use a tripod.
Not to mention, a tripod is helpful when taking photos for processing. This entails taking pictures with a clear idea of how you'll edit them afterward. This is true when taking pictures for HDR and photo composites.
These two methods are widely used in real estate photography. Later in this article, I will go into more detail about them. For now, remember that multiple images with the same framing are required when shooting HDR and composites, and this can only be done correctly with a tripod. Certain apps will also trigger the camera and provide a photo preview on your smartphone or tablet, enhancing the convenience and versatility of the photography process.
6 - Choose The Right Lenses (ISO)
You will require an excellent wide-angle lens, such as the Canon 17-40mm f/4L or the best Canon wide-angle lenses you can afford, to take real estate pictures with a DSLR camera. This lens is ideal for capturing the entire living room (not just a corner) and visually enlarging a room, creating a more comfortable and inviting look. It allows you to cover the maximum space and fit the most information in a single shot, which is crucial for professional real estate photography.
A 16-35mm zoom lens, which will give you a field of view that ranges from 107 degrees to 64 degrees, is a great focal length that works for most real estate photography situations. For the broadest area of view, it is best to use them on a full-frame camera at this point. If not, you'll need to use a conversion factor.
When photographing real estate, be cautious when using shorter focal lengths. They can skew your images.
7 - Use Ambient Light When Possible
Large-scale lighting requires time, expertise, and equipment. Budgets and schedules for real estate photography don't always consider these factors. Thus, it is preferable to take the photo using the present ambient light.
Here are some pointers for utilizing ambient light:
- Place yourself so the windows are 45 degrees to you or on your side. Keep the window from being directly in front of or behind you.
- If there is an excessive contrast between a room's outside and interior, think about closing the blinds or curtains.
- As much as possible, keep the lights off to prevent uneven lighting.
- When taking pictures outside, ensure the light is shining on the building's front.

8 - Be Careful Mixing Color Temperatures
White balance is one of the more challenging aspects to control when taking real estate photography because of the varying ratio of outside natural light and interior artificial light.
As you are probably aware, the color temperatures of light from various sources vary frequently. Kelvin degrees are used to measure this.
For instance, the light temperature at noon on a sunny day is approximately 5500 Kelvin degrees, while the temperature of light from a desk lamp is typically between 2700 and 3000 degrees. Natural light will appear white, and the desk lamp will appear yellow at these temperatures.
It can be not easy to correct different light combinations in post-processing. It can take hours to make the necessary adjustments when attempting to achieve a neutral color balance. However, you can occasionally use them for a particular effect.
The best choice is to make an effort only to use one kind of light sources. Turn off the interior lights and only use the window light if a lot of light comes in from the windows. You could also use a flash and indoor lighting to block out natural light. I recommend using flashes or strobes as light sources, which provide flexibility when lighting interiors. Feel free to take a test shot without flash, then review the image on your LCD and determine the areas that require fill light. Monolights would be the best option since they have a brighter light output.

9 - Choose The Best Perspective
Consider the purpose of your real estate photography, which is to showcase the features of the property and portray it as impartially as possible when deciding where to set up your tripod.
The limitations of real estate photography are something else to take into account. As a viewer scrolls through hundreds of listings, you will only have a limited number of images to highlight the property's features while also piquing their interest.
However, some properties don't have much room for maneuver. To be able to stand behind the camera in a small space, you might have to shoot from the doorway. A wide-angle lens, such as the one mentioned above, can also be helpful in this situation. To give a better sense of the space, always try to include three walls and capture the rooms from different angles so they are showcased in the best light possible, shining like the rest of the property.

10 - Shoot At The Right Moment
Perspective distortion must be avoided or reduced when photographing real estate.
You need a leveled camera to accomplish this so that all verticals, such as doorways, wall corners, etc., appear straight. To be sure of this, use a double bubble level. It would be best to mount a tilt-shift head on your tripod to move more precisely.
Although it requires some attention, leveling the camera is simple and not subject to debate.
However, because it varies from room to room and is subjective, determining the ideal height to shoot from can be more challenging.
The accepted practice for preventing distortion is to shoot at chest height. However, this occasionally leads to excessive ceilings and insufficient foreground. In some instances, it might even involve removing a piece of furniture too close to the camera to avoid an awkward composition. To take your real estate photography to the next level, consider investing in a remote trigger for your camera. This device lets you capture images without touching the camera, preventing accidental shaking or blurriness. You can achieve a touch-free setup for your shoots using a remote trigger, ensuring sharp and high-quality images.
Additionally, one crucial camera setting to keep in mind is the aperture. Use an aperture value from f/7.1 to f/9 to ensure optimal sharpness and clarity in your real estate photos. However, if you want to highlight some objects, you can try a shallow depth of field with a wider aperture setting. Generally, the three best camera settings for real estate photography are aperture, shutter speed, ISO, and drone photography.
You'll need to shoot from a lower height to resolve this. Most real estate photographers advise using a doorknob's measurement. Before you gain more experience, experiment with shooting from various sizes to determine the best for each shot.

11 - Correct Perspective Distortion In Post-Production
If perspective distortion is unavoidable while shooting, you can fix or lessen it in post-production. This is crucial, especially in real estate photography, as convergent lines are the easiest way to spot a novice photographer.
Most editing programs have a function that lets you fix perspective and lens distortion. Use Lightroom, Photoshop, GIMP, or any other editing software on a desktop.
I enjoy using Lightroom or Adobe Camera Raw for post-processing real estate photos.
After that, I use the presets in the Geometry section by selecting "Upright" next to the icons to fix any perspective distortion. As an alternative, you can manually fix perspective distortion using the sliders.
There are effective apps like SKRWT that are great at removing perspective distortion for those of you who take photos on a mobile device. Both Snapseed and Lightroom Mobile have tools for distortion correction.
As you can see, correcting distortion is very simple and has a huge impact.

12 - Use HDR
Real estate photographers frequently use high dynamic range (HDR) photography, which combines multiple images of the same scene taken at various exposures to produce a final image with a final image with an overall proper exposure.
This lets you capture information from disparate scenes, like a dark interior with bright light coming in through a window.
You must use a tripod to take an HDR photo. Take at least three pictures with various exposures after your camera is stabilized on a tripod. Only the direction will change; the framing must be precisely the same.
Three photos, one for the highlights, one for the midtones, and one for the shadows, must all be adequately exposed. By capturing more of the dynamic range, taking more than three images can help you achieve even better results.
Once you have your photos, you must use post-processing to combine them into a single image.
Some specialized programs, like Luminar NEO, offer much flexibility when working with HDR.
Photoshop is a beautiful alternative that includes an HDR feature. Open Photoshop and select File>Automate>Merge to HDR Pro to use it. The files can then be chosen, and Photoshop will combine them to create a single HDR image. The HDR interface sliders can be used to fine-tune the outcomes.
This method can result in images that appear unreal or manufactured. To avoid taking a picture that doesn't accurately represent the area you photograph, use a light touch or choose a few images that will benefit from this technique.

13 - Photo Compositing
A different method real estate photographers use is photo compositing, which is far more intricate and time-consuming than HDR photography. Use it only if the lighting is highly challenging and the price is reasonable, given the work involved.
You must first frame your photo and mount your camera on a tripod to create a composite image. Then, while moving around and lighting various areas of the room with a flash, take a picture each time.
For one shot, for instance, stand to the right and point your flashgun to the left side of the room while taking a picture. Then, turn to the opposite side and light the appropriate area of the room, and so on.
The number of images you need for a good composite will vary depending on the room size and the available light.
Once you have all your images, add layers to one Photoshop document. You should only use the area of each layer that the flash illuminated. A layer mask can be used to conceal the remainder. Your finished image should depict a perfectly lit room once all the layers have been combined.

What are the benefits of professional real estate photography?
Professional real estate photography offers numerous benefits for sellers and agents. It helps attract more potential buyers, creates a positive first impression, highlights the property's best features, increases online visibility, and leads to faster sales and higher selling prices.
Best Pricing Real Estate Presets
Bright Home


Boho Vibes
Conclusion

These suggestions should be helpful whether you are a real estate agent, a professional real estate photographer, or a homeowner who wants to take their own real estate photos.
Comment below if you have any queries or want to offer advice. We'd be thrilled to hear from you!
Leave a comment